Static site generators (SSG), like Astro, are great for building static pages. However, they rarely come with site search functionality out of the box. Usually, there is no content management system (CMS) or database that holds the contents and which you could query for search terms.
In this tutorial, we are going to build a simple search for Astro that allows us to query the frontmatter of Markdown/MDX posts. We will create a Preact hook that performs the search. For the UI, we will create a Preact component to let the user enter a search term as well as a Preact component to display the search results in a list.
Tools
On the command line, I have been using fzf - in combination with fd - for quite some time now. I use it to search for directories, previous commands in the shell history and other search/filter related tasks. Luckily, there is also FZF for JavaScript, which is an unofficial port of fzf for the browser. We will use this module to power our search.
For the user interactions, we need some HTML and client side JavaScript. To make things easier for us, we will use Astro’s Preact integration, which you need to setup, if you haven’t done so already.
Install fzf
To add fzf to our Astro project, we need to add it as a dependency in our package.json:
{
  "dependencies": {
    "fzf": "0.5.1"
  }
}
After that, we install it using yarn - or whatever is your package manager of choice:
yarn install

# If you use npm, use this command instead
npm install
useFuzzySearch hook
To perform the actual search, we create a hook that handles searching through the frontmatter fields of our Markdown/MDX posts. We memoize the search result to not perform the same search over and over again, but search only, if either the posts, the search term or the frontmatter field in which we want to search changes.
import { useMemo } from 'preact/hooks';
import { Fzf } from 'fzf';

/**
 * Search for search term in post's frontmatter
 *
 * @param {array} posts List of posts to search in
 * @param {string} searchTerm Term to search for
 * @param {string} field Frontmatter item in which to search
 * @param {object} [fzfOptions={ }] Additional options to pass to fzf
 */
function useFuzzySearch(posts, searchTerm, field, fzfOptions = { }) {
  const fzf = useMemo(() => {
    return new Fzf(posts, {
      selector: post => post.frontmatter[field],
      ...fzfOptions
    }, [ posts, field, fzfOptions]);
  });

  const searchResults = useMemo(() => {
    return fzf.find(searchTerm);
  }, [ fzf, searchTerm ]);

  return searchResults;
}
User interface
For this tutorial, we are going to keep the UI quite simple. We’ll need a component with an input element for the user to enter a search term as well as a component to display the actual search results.
I have intentionally left out all CSS stylings, error handling etc. to make it as easy as possible to comprehend this tutorial.
Search component
The search component expects - as prop - the posts whose frontmatter are to be searched and the field that should be searched in. Whenever the searchTerm changes, the useFuzzySearch hook is executed to retrieve the search results. If there are search results, these will be passed to the SearchResults component that we will create in the next step.
import { useState } from 'preact/hooks';
import useFuzzySearch from './useFuzzySearch';
import SearchResults from './SearchResults';

const DEFAULT_SEARCH_TERM = '';

function Search(props) {
  // Initialize state variables
  const [ searchTerm, setSearchTerm ] = useState(DEFAULT_SEARCH_TERM);
  const searchResults = useFuzzySearch(
    props.posts,
    searchTerm,
    props.field,
    { fuzzy: false }  // We only search for full word matches. See
                      // https://fzf.netlify.app/docs/latest#api
                      // for available options
  );

  // Called whenever the value of the input field changes.
  function onInput(e) {
    const searchTerm = e?.target?.value;
    if (searchTerm && searchTerm.length > 0) {
      setSearchTerm(searchTerm);
    } else {
      setSearchTerm(DEFAULT_SEARCH_TERM);
    }
  }

  return (
    <div>
      <input
        onInput={ onInput }
        type="text"
      />
      {
        searchResults &&
          <SearchResults
            searchResults={ searchResults }
          />
      }
    </div>
  )
}
SearchResults component
The SearchResults component will display a simple list with the posts whose frontmatter field matches the searchTerm.
function SearchResults(props) {
  <div>
    {
      props.noOfSearchResults === 0 &&
        <span>No search results</span>
    }
    {
      props.noOfSearchResults > 0 &&
        props.searchResults.map(result => (
          <p>
            { result.item.frontmatter.title }
          </p>
        ))
    }
  </div>
}
How to use
Now that we have both the logic and UI for our search ready, all we need to do is add our Search component to any Astro page. We add the client:visible directive to hydrate our Preact component once the Search becomes visible to the user.
---
import Search from `Search.jsx`;

const posts = await Astro.glob('@posts/**/*.mdx');
---
<Search
  field="title"
  posts={ posts }
  client:visible
/>
Final words
This is just a basic example on how to add search capabilities to your Astro powered website. As mentioned, I left out all CSS stylings, error handling etc. to make this tutorial easy to understand. However, it should be a good starting point if you want to implement a search on your website yourself.
With the addition of some CSS, the end result might look like the image below. For an interactive demo, go to the archive page of my blog.
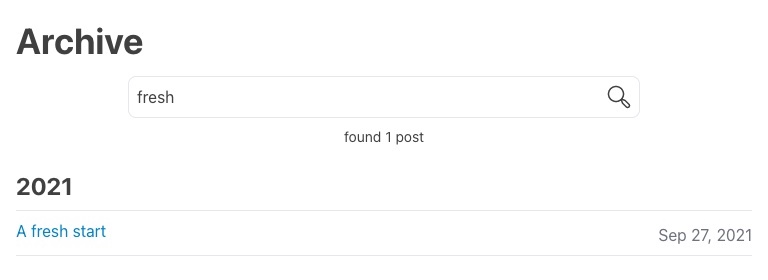 Example of a fuzzy search with CSS applied